Tuesday, April 20, 2010

The New Layout

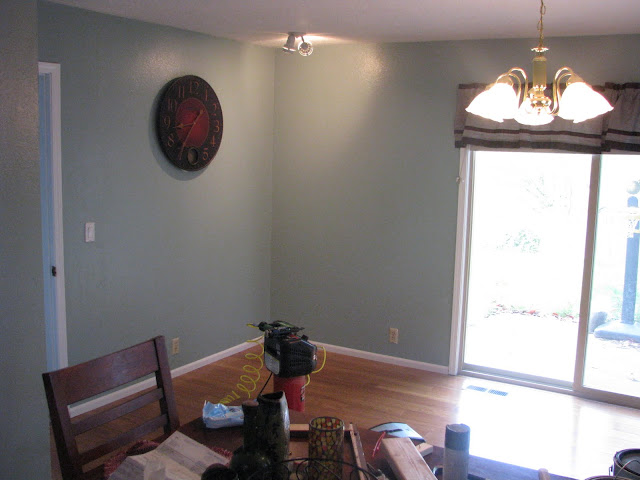
The dining room table is now where the bench seat was. While it looks all stark and bare, it's actually quite cozy and nice with it there. Once we put the artwork back up, it will be better too.


And the converted bench now sits on this side of the room. As you can see, it really opened it up for a path to the sliding glass door. We can easily slide the main table out to the bench when we have lots of guests over or bring more chairs to this table too.


So the bench is NOT done as you can see. I got the new fabric on it, and sealed up the one end. I am going to add the back on there to just below the window so you can lean back a little. I am going to add wood to the face of all 4 sides which will hide the edges of the fabric and make it look like a stand alone couch like bench. The wood will look like the next picture after the bench.


Remember this organizer? Well, I love the design I did on the front so much I am going to do the same to the bench in the dining room. BUT, we are still a bit unsure if we should do the same stain to match the tables, or do a white which will match the trim, but not necessarily the fabric....choices...choices...

Stay Tuned for the finished bench!

Monday, April 19, 2010

The Rest of the Floor

Well, the floor is finally done. It took some time but its done!!

I was able to finish the rest of the floor with Robert's help. It took a bit more time to redo all the trim and install the transitions to the other rooms. It went really fast actually for the laying of the floor which was nice.

Funny part is that now that its done, everyone keeps hanging out in there. Nobody would do anything except eat and leave before. Now, people are drawn to the room. The kids love to play on the floor and just sit there.

I will take some final reveal photos soon. I took the bench apart and made the longer section into a straight bench and moved it to the right side of room under the large window. I moved the dining room table to where the benchseat used to bed. Now its a bit like a restaurant benchseat that way. Oddly enough, it actually opens up the room a bit and makes walking to the back sliding glass door WAY easier than it was before.

But I get ahead of myself in photos. While I have done all that, I only have pictures of the finished floor, trim, transitions etc. I will be taking more photos in the next day or two once I complete that last bit of the redo for the bench. In the meantime here are a few more photos.

Monday, April 5, 2010

Laying the Floor

You know...Sometimes I am not known for my patience. That is a good explaination for why I just couldn't wait for a full weekend to install the flooring. This last Saturday we were supposed to have some friends visiting. I woke up early to a text message cancelling that visit. While I was sad that we wouldn't see them, a little part of my brain started to whisper (why not lay floor?). So I got up and before I knew it I was taking apart the bench I had built and clearing out all the furniture I could from the diningroom.

My best friend Tricia came over. She and I have known each other for 10 years and we have done so many moves, projects and other schemes together that its hard to imagine doing a project without the other person. She didn't get my message though until later and didn't show up until 2pm. So we didn't have a LOT of time given that I wouldn't have time on Sunday since it was Easter.

We got started and within a row or two we hit our first issue. The dishwasher wouldn't fit back under the counter with the new floor under this. We lowered it once, but it wasn't lowered enough. Impatience won out and we moved on. This experience is so different than the last time I tore up a floor and installed a new one. This time I have better power tools and I know how to use them better!

We put the fridge and stove in the dining room and got a bit laid out. Can you see how happy I am??


I thought nothing could make that old floor uglier than it was. Turns out that seeing a nice looking wood floor next to it will make it look even uglier by comparison!

Behind the stove was a breeze, but we were ready for a challenge with the fridge. As everyone knows if you have cabinets above a fridge you have to be sure that adding in the height of the new floor will still allow the fridge to fit. I looked up there before I started and it barely touched already. So, yeah, there was no way it would fit afterwards. Robert and I had agreed to take out the cabinet. Just cut it out carefully so as to leave the cabinet on the other side unaffected. But we got a break instead. Tricia and I removed the facing to the cabinet. Just the middle board and the 2 bottom pieces of trim. Since the trim came down below the bottom shelf I came up with the idea to just try putting the fridge back like that. Perhaps it would fit without fulling removing the actual cabinet. Sure enough, it fit fine. So I will just cut some new trim pieces and reinstall the cabinet doors and call it good. :-)


Dang that's one sweet floor!


Unfortunately she did have to leave at 10pm. But we did get the kitchen totally done (flooring at least) and got a little ways into the dining room. All I have left to do now is the last bit which should be easy (given TIME that is) because all that's left is square and no fancy notches etc like we had to do in the kitchen.

I can't wait to see it with the baseboard intact. Its going to look even nicer with the trim there!


Stay tuned for the finished floor and the trim installed!

Thursday, April 1, 2010

Ooooh, The Flooring is Here and I LOVE It!!!

I couldn't resist and I went and got the new laminate flooring. I picked up some Pergo since it was on sale for 15% off . I also had a 10% off coupon so I got it for a steal! Can't beat 25% off flooring!!!

Welcome to the house beautiful flooring!


And the close up of the color


For that project I can tell you....I WILL be clearing the room if I have to take apart the bench I built to do it. I am going to have to rework the bench to make it fit and match in color and fabric for the room....or I may not put it back in the room. I love it, but I need to come up with some creative fix for the bottom. I built it to fit in that corner and not move. So its straight 2x4's with MDF facing and of course the foam and fabric. I didn't put anything below the 2x4s on the bottom since I didn't care about the lanolium. BUT, I am not going to have it scratch up the new laminate. What to do...what to do....

And for those who wanted a peak and how I built it, here is a quick picture review.


Stay tuned because I think I may install that flooring soon!