Sunday, July 31, 2011

8 Weeks Now

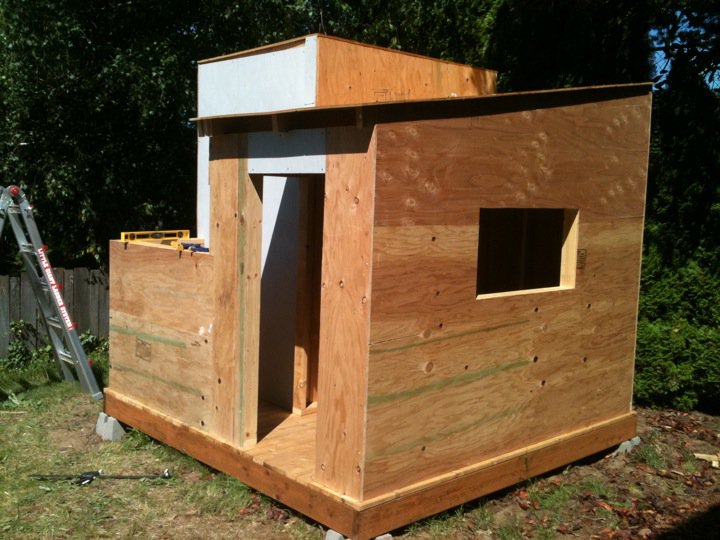
It has been 8 weeks since I started building the castle. I had hoped to be fully done with this project by now, but I am still enjoying every moment of building it. Most of these last 8 weeks I have worked nearly non-stop on it. This weekend was a little different. We went to a friend's BBQ party on Saturday that was from 2pm-8pm. So yeah, I didn't get a lot of work done that day obviously. Today we went to the park and a million little things that kept me from getting out there. I DID get a few tiny things done though.

First of all during the last week I did get a little of the trim done. Mostly because I took my daughter to the doctor's office one day and took the rest of the afternoon off. She was tired and slept all afternoon while I got this trim done. Add a bit of sunshine to quickly dry my layers of paint and I was able to make fairly good progress.

First off, I trimmed out the screen window I installed last weekend. It is WAY less ugly now. :-) In fact, I quite like it. I put in the waterproof caulk around the edge and it looks pretty schnazzy.


Here is a close up of the window. I basically made a square frame of wood and wrapped the screen around it and stapled it. Much like covering a footstool with fabric. I put the trim about 1/4 of an inch back from it. I thought the fact the grey screen material covers the white of the frame it would look odd, but since the castle is grey, it actually makes it look like it was supposed to be this way.


As you can see, the kids think the windowsill is actually the car garage. I think its cute, so I let them leave them there. I will move them when I make the second part of the window with the Plexiglas.


I was able to build the second screen window for the other side of the castle. The large window in the tower. I still need to finish caulking it before adding the trim, but at least I can stop worrying about the kids falling through it!


Here is a close up of the screen window. You can see it is just a simple frame of wood with screen material wrapped around it. I just tapped it into place and then screwed it to the window frame in 8-10 places. A bit of overkill, but I feel safer knowing its not going to be easily pushed out etc. The frame will cover all the white window frame and come over the screen frame leaving about 1/4 inch showing.


Finally this weekend I started the interior trim work. I have one piece left to cut since I biffed the other one I had for that spot. Wont take long...maybe tomorrow night.


As a final attempt to accomplish something, I also got the piece of wood cut to enclose the stairs. For fun, I decided to paint the piece yellow instead of purple. Just to keep it colorful. I was thinking of maybe adding some stuff in this area. Like a magnetic board with letter and numbers. Or animals, or I don't know. Just to keep each room with a play area I guess. I still want to add carpet to the stairs just to make them less hard on the hands and knees when crawling up them.


Every weekend I think "This is going to be the last weekend". And then it isn't. I feel like I can never get anything done. And yet it IS getting done. This week I hope to make some progress on the sun room and the final trim work on the windows. Stay tuned!

Sunday, July 24, 2011

Sunny Sunday

I don't feel like I got very much done today, but my ever supportive husband insists I did a lot. I suppose if I didn't stop to mow the yard or run to Big Blue with the whole family I might have gotten more done. BUT, this project, while awesome, still rates #2 to family time. :-)

Okay, so I spend some time on windows and doors today. I framed in both large windows as well as the front door. It was super hot outside so that slowed me down in some ways. I had to stop more often for water, but I didn't have to wait long to put a second coat of paint on the wood I was painting. This in itself is so great. I don't have patience waiting for paint to dry.

Framed in window in the tower. I need to go back and re-caulk the top. Looks like I missed a little bit there. This will look crisp and cool once I put the exterior trim on there.


Stepping back to see the more clean view of the front door with the frame in there. This is probably a good time to explain why the little windows did NOT get framed in. I was talking to my friend who knows construction about my unhappiness with the "courtyard" in front. I don't like that it is open. It just doesn't work in Oregon with our rain. I would like to make it more of a sun room kind of shape and feel. Just simple framing and perhaps Plexiglas or clear plastic or SOMETHING clear to enclose it, but yet still feel open. The problem is the design so far. In order to have an angled roof line to drain the rain water, I will have to move the windows. I would like the roof to come out from below those 2 windows and slope down similar to the slope of the great room's roof.

Now if you look at the door between the courtyard and the great room, you will see there is no room to slope down from below the windows and be able to clear the door. If we enclose the courtyard then I don't HAVE to build a door for that side. I love that idea. So I was discussing the design and it was decided the only way to do this is to break out the Sawzall and actually move those windows UP. This would give me the room I need.

I realize this will break from the original inspiration playhouse design, but while it will look different, it will work better for me and the family. 


Here is the first screened window. I do not particularly like the way I did it, but it will work, function and not be too ugly. Its a little ugly right now, but once I put on the exterior trim, I think it will look a lot better. As you can see, I also got the first piece of the bottom trim installed. So this wall is just about done. 4 pieces of trim around that window and I wont have to touch this side again. :-)


Here is a closeup of the screened window. It looks a bit worse for wear because I caulked all the gaps to make sure I can keep out at least SOME of the water. I built a simple square frame and then wrapped screen material around the edge and stapled it in place. then put the from on the outside edge of the window ledge and screwed it in all the way around. It will be a permanent screen. The trim will be 2.5 inches wide and come down and leave only about 1/4 of an inch of the screened frame showing from the outside. Again, not the prettiest of most perfect design, but it will work for a playhouse. I could have build one with a metal frame with real screen parts, but I just didn't want to have metal on the playhouse.


Okay, so this angle shows both the front door and window framing. I can't wait to get the bottom trim done as well.


Even without the trim, I think the front door looks prettier framed in.


I am hoping for lots of sunshine and early bedtimes for the kids this week so I can get through some of this trim work. It would go faster too if I would just buy some more white trim paint. I am scraping the bottom of the can trying to stretch it. :-( I just didn't want to spend more money! I need to start taking donations, sigh.

Stay tuned for more trim and punch list items.

Saturday, July 23, 2011

Ticking off the Punch List

So I put together a punch list this last week of everything I needed to do on the playhouse. The list is not too extensive, but still a lot of work left to do.


So, I got started by adding the top trim to the tower. This was a major pain in the booty. Holding something while screwing it in while standing on a ladder with a level balanced on top....yeah, it was harder than I thought to do it without help. I did manage it and I think I may have even gotten it level which would be equally amazing! We had been having rain again this last week so I had boarded up the window to keep the majority of the rain out until the rains stopped. It looks a lot more like a castle now! :-)


The view from the front. I really needed air while I painted inside the tower so I had removed the boards from the front. But, it was still raining on and off. Turns out the painter's tape I was using had plastic attached to help with splatter. This turned out to be just the ticket. I could attach the tape  to the top of the inside of the window and then tape it down outside. This meant any water dripping from the roof would hit the plastic and run down and away instead of inside the playhouse. :-)


I was able to begin trimming out the fake fireplace. This shot shows the white trim casing and peaks in at the stairs I STILL need to enclose. I swear I will get to it soon! 


While my husband and I agreed on the yellow for the "great room", we let our son dictate the color of the tower. He chose purple. I tried to keep it about the same color saturation as the yellow so its a pretty bright purple. I still have the painter's tape on it in this shot, but it gives you an idea of the color. 


And finally I was able to take everything off the windows since the rains are stopped and will stay stopped for at least 10 more days. Woohoo!! I got out there this morning and painted the whole exterior which gave me a warm fuzzy feeling of getting close to completing the project. Plus it was one more thing on the punch list to complete. It does look lovely and more like a castle being grey. I love how all the colors of the interior show through the window and door.


From this angle you can see a sneak peak at the fake fireplace that is also now complete.


And here is the fake fireplace that leads to the tower. I added a cute little mantle. The mantle is made up of a 2x4 support piece topped with a 4.5 inch deep piece of plain white wood painted to match. I got some crown moulding and corner attachments and surrounded the underside. It may be fun to take a small vase and permanently glue it to the fireplace mantle, and maybe add a family photos permanently attached to the wall above the mantle to give it a more finished look. You can also see the first piece of cedar I put in for the window ledge. Once I have the window framed in I can build the screens and windows. It wont take me long to cut the other pieces, but it will take a bit to paint them white.


Stay tuned. There is so much more to come!

Sunday, July 17, 2011

What a Wacky Weekend

Let's start by saying that I love my kids. What I DON'T love is having to come home when I barely left the house because the toilets are overflowing from something one of them must have put in there. My Friday began this way. I came back home and called into work. I finished cleaning up the mess after my husband did the majority of the work. He had almost all the water mopped up, but I had to make the calls for a plumber. What a fiasco!!! It was the kid's bathroom that started it. It has been having a bit of trouble for about a week on and off. That morning my son did his morning pee and flushed. Instead of going down it went UP. Eeek. So my husband plunged it and all seemed good. Until my daughter peed in our bathroom and when she tried to flush it also went up and over. Sigh. Plumbers didn't want to come out until Tuesday and I wanted to be able to use an upstairs bathroom instead of walking downstairs to the 3rd toilet in the middle of the night. Not to mention the massive amount of towels we used to mop up the water were all sitting wet in the shower and we couldn't use the washer. We tested it and sure enough when the water would drain from the washing machine, the water in both toilets would start to rise bringing forth stuff we would rather not describe.

In the end we got the plumber to come out Saturday morning and then we scrubbed all the bathrooms like we haven't probably done since we moved it. They are super mega cleaned. Bonus since they had to remove the toilet (yup, that bad of a blockage) I was able to paint behind the toilet really quickly. :-)

So you can imagine I wasn't even able to begin on any normal work for the playhouse until Saturday afternoon during nap time. I did manage to finish the roof on the tower on Friday while waiting for the call from the plumber. I used up all the last of the shingles I had and lo and behold I needed 5 more. Luckily at our local Home Depot, the sell shingles individually as well for just this instance. Unluckily for me, I mistook one black for a different black and ended up with 5 black, but not the same black as I had shingles. I don't mind though. I highly doubt anyone will be checking out the tower roof and as long as they work, I don't mind that they don't match. I didn't take a picture of it though. I am not sure why. Just forgot I guess.

Did I mention it was raining really hard on Saturday as well. So that meant I wasn't really able to do a lot of exterior work on the playhouse. So instead I went inside. Apparently I do good work on roofs etc because its nice and dry inside. So I did what I could. I primered the "great room" and started to paint the trim white. After the primer was dry I painted the yellow we picked out. The picture on my cell phone didn't really show the color all that well though. Because it really is a much brighter yellow that the picture shows.


Today with continued rain I tackled the tower. I only got as far as primer, but its progress at least. I also got most of the fireplace built as well. I finished that after the sun went down so I couldn't snap a picture though. It is going to be fabulous! I love how the white trim looks around the fireplace/door to the tower. Once I put on the mini-mantle it will look even more like a fireplace. :-)
 
My awesome brother called me and gave me some wonderful advice on building the windows. I am so jealous about how great his look. He gets to take a slightly easier route since he is in San Diego where it is sunny and very rarely rains. Here in Oregon I have to worry a lot more about rain and water so my windows will have to have a bit more protection than his. I am going to use the same concept as his though and I have all the wood for it. I just ran out of time this weekend.
 
I love how it is looking though. I do admit it has finally hit me that this is not much of a playhouse as it is a mini-house. Oh well, they will love it even if its not perfect. Its a far cry from the piece of wood and scraps we nailed to a tree when we were little and called it a playhouse. hahaha. Then again, my kids will have to come inside to go pee. Our playhouse was by the old outhouse on our property. Handy for us it was still a usable outhouse after all those years, but my kids will have to be all modern and use the regular potty. Not sure they will ever see a real outhouse in their lifetimes.
 
I digress. I am trying to be interesting given I have such a lack of photos for this entry. Progress is being made though. I WILL finish this soon. Even if I have to work every night on it!

Sunday, July 10, 2011

Little Touches

I don't think I got very much time on the playhouse this weekend. I know I took most of this week off to be lazy and rest. I was feeling a bit burned out by the sheer number of hours I worked on it last weekend. Anyway, what I got done were a lot of small things. Things that if I took a picture of the place, it might not really show up as obviously as finished a full wall does.

I was able to finish putting up walls in the "great room". In previous pictures you could see it looked done, but behind me in the photo the inside of the door wasn't done. With that done, I was able to do a little primering and test painting a small spot of the wall to see how the color we picked out looks. Its going to be a bright yellowish color. I will primer the walls first so that's why there is the white background.


I have figured out what I will do for the window, but I have to actually sit down and build it and see if it will work. So it sits undone for now. I also went and trimmed out around the roof line as well. This will be painted white I think. My husband says this reminds him of the little rascals playhouse. That made me laugh.


I also finished the patio finally. I had to buy a couple more sheets of sheeting because the scraps I had just were not enough to cover it properly. For now I have just plain white wood as the topper for those walls. I will have to be very careful to primer and paint it well. Eventually I will go back and buy some expensive wood/product that can handle having water sit on it, but I am tapped out of money for expensive touches. Unless someone wants to donate to the cause, I will have to deal with cheaper materials for the rest of the project.


And that is about it. We had guests over for dinner on Saturday and today was so blooming hot that I couldn't do much. I did do all the stuff above today, but man I was hot. I wasn't able to work on it until late afternoon and that was the hottest time. Once I got the kids to bed I had to go to the store instead of working on this. Life happens.

Oh and for what it's worth I also cut the pieces I needed for the trim around the tower top. I don't know if there is a technical term for it, but the piece that has those ups and downs on it. I have them cut to width already. The trick I think is to paint these white BEFORE I put them up. I don't think I want to try to paint them white after installing them. Otherwise I would have had them up there already. I am learning this takes a lot of time and since I am doing all the work myself, my wonderful blog fans and family will have to wait for each step. If the weather holds out, I may try to get more done in the evenings by building the doors and doing some of the painting in the garage. Then I can be working on it later than I can outside where it would make too much noise.

I keep thinking I am just about there, but then I find a million other small details I have to do. Have patience. Its going to be really cool once its done, but it is not a fast build.

Monday, July 4, 2011

3 Day Weekend Progress

This weekend I accomplished a lot and yet not very much at the same time. On Saturday I jumped into the great scary world of shingles and roofing materials. I learned that it can get VERY hot while laying shingles down. That even with gloves on, your hands will ache and be scratched up.....well the scratched up I may have learned when I was learning to wear gloves while laying shingles.

With a larger roof, its easier because you can lay more without cuts. In a small roof, no matter what you do, you are cutting nearly every shingle. So it was a long 4 or so hours and I think it turned out okay. Or at least mildly okay. The flashing was a paint in my booty, but I think I tamed it. I have NO idea if I did it right, but hey, at least its on there and I can put a dab of water proof caulk might hide any boo-boos I may have done.


I also made great headway on the interior of the "great room". I got nearly all the walls completed. Then my daughter started to move in her play kitchen goods. I had mistakenly brought in her play kitchen I am building to see how it would fit. She got so excited she brought all kinds of toy food and bowls etc into the "kitchen". She made me sit on the floor and she made up some "medicine" to make my arm all better.....I wasn't even aware my arm was "sick". Well, I did get a touch of sunburn on my shoulders.

Anyway, I am trying to resist the urge to lay down some solid flooring and seal the inside even more than it already is. Must resist....I already feeling a bit of project fatigue. I am going strong and I am getting a lot done, but its getting harder and harder to get started each morning. There are so many tiny details left, but I am loving it either way. I am pretty proud of my little house I built.


Saturday, July 2, 2011

Exterior Walls

It was a semi-productive day today. Once again I started at 9am, but somehow I didn't get much done until after lunch when I put my daughter to bed for nap time. Once I did that, I went outside and just blew through the front pieces and almost got the whole exterior covered. I bought the roofing materials last night, but didn't get around to the roof yet. I am going to have to do it early tomorrow. The afternoon heat is brutal and I can't imagine being on the roof sweating etc during the afternoon sun.

But first, remember this is what I am trying to recreate. This is a kit you can buy online for about 7K. I don't have that much money so I am building my own....sort of. I am not doing the dormer window above the front door (mostly because I couldn't figure out how to build that part) or the chimney thing because it seemed pointless. But the general idea is to get close to this......


Here is mine from close to the same angle. I still have a lot of work left to do, but given the small amount of time I can give to it on any given day. I am getting it built faster than I thought I would.


I do like the look of it. I can't wait to have the "great room" done where I can decorate and paint and play in there with the kids.


Stay tuned for what I get done tomorrow! :-)