Thursday, December 22, 2011

Where Did The Year Go?

It seems like only yesterday it was spring and I was looking forward to starting the playhouse castle and I was ready for summer. I blink and the castle is built and we are looking at New Years to be next week! Eeeks.

I have been quite busy between working out, wrangling kids, staying up late finishing some orders and getting the courage up to start a Facebook page for my someday business. I got the 7 signs done and all but one are in the mail. Woohoo! The background color on one was taking longer than it should to get it right. I am not very good at painting small parts without painting outside the lines. Anyway, at least those are done and I could take the time to make some cute little toddler chairs.

They are BUILT!!! I actually think they are cuter than the first set, but I am not totally sure why. They still need to be stained and sealed, but it has been REALLY cold in the garage and with Christmas shopping happening, I am not having the time. :-( But soon, (next week) they will be done and I can deliver them!


I also finally set up my Facebook page for Tabitha's Workbench. I have not put anything really on there for sale yet, but I am working my way up. My best friend's daughter actually send someone to my page and she ordered one of these toddler chairs with a small art table for her daughter. I am very excited to make it for her. While I probably didn't charge as much as I was supposed to, I am going to chalk that up to experience and a discount that hopefully will mean she can write a little paragraph about how she likes the table and chair afterwards. As I said, a work in progress. 

And Christmas is this weekend. We leave tomorrow for my in laws so don't expect another post until after the holidays are over. I am just too busy to actually sit down and type up anything. I am doing this while wrapping presents as it is. Busy busy busy.

Happy Holidays everyone! Happy building!

Sunday, December 11, 2011

Tiny Progress on Backlog

I wont play the broken records of my busy weekends not getting anything accomplished. I think everyone is tired of that. So instead I will just state that I made some lovely progress. I got almost all the name signs done. I had a couple with more complicated painting and I am still finishing those up (I just didn't have the time). So they are sitting there and just need some shellac, time and packaging materials. 

I also finally got some progress made on the last 10 toddler chairs for the preschool. I spend a good number of hours (until 11pm on Friday night) cutting wood for them. I usually have my cutoff at 10pm for my neighbors sake, but I am hoping they will understand with the holiday's coming that I may be working late on projects. I tried to make it easier for me later by routing with a round-over bit the edges of the legs to they are less pointy. This is when I learned that the output of my palm router was directed onto my space heater I use to not freeze out there. A little sawdust here or there and nothing happens, but after the amount I was doing it was too much hitting the heater at once. This meant a pile of sawdust burst into flames. I looked over and realized where my sawdust was going a couple seconds before it started on fire. Luckily I knew what I was up against and tilted the heater to get the sawdust on fire onto the ground and out of the heater. This works well as long as you are careful to stomp it out without spreading it to the sawdust all over the ground. I got lucky this time and it all stomped out fairly quickly and didn't ignite the sawdust on the ground. I am not super careful about my heater. I wouldn't use it, but it can get REALLY REALLY REALLY cold in there.

As it is, I wear jeans, a cami under my regular shirt, under my sweater, under my ski jacket, and I have gloves and a scarf on. The scarf is only there so I can tuck it over the top of my zipper on my jacket. It gets super cold against my lips and the scarf keeps that from happening. Anyway, I am dressed like I am ready to go to Alaska and help Anna build her house. Even with all those clothes and layers, it can be chilly out there and the space heater helps my legs since jeans are not quite warm enough. I can't help but dream about a heated workshop where I can just wear some overalls and a regular long sleeve shirt and be warm and comfortable. Sigh. Some day, right?

Friday night was for cutting all the wood out. (Yes, those are storage bins for my screws. I bought a LOT of KREG screws in bulk and this keeps them organized and easy to access)


Then Saturday night I had enough caffeine to last me until midnight and went out there again. This time I only managed to work until 11pm before getting too tired and cold. I started to assemble the chairs. I didn't get all the fronts and backs done, but I am a lot farther than I was. Hopefully this week, I can finish getting the signs out the door and the chairs completely built!


Well, time to finish up some other work and go to bed. Have a great week and Happy Building Everyone!

Monday, December 5, 2011

Not Gone

Sorry to do such a disappearing act, but Thanksgiving and the weeks since then have been a crazy blast of busy. Thanksgiving was a success and everyone agreed the chairs were comfortable and that everyone had lots of room at such a large table. Once Thanksgiving left the house, it has been a madhouse of stress at work, attempting to work out more nights (which means less nights in the freezing garage) and lots of projects begun.

I am trying to get more fit which means working out. I have had to sacrifice some of the evenings to work out instead of building. Since I have little to no money for new wood, this hasn't been much of an issue. BUT, I am still behind. Before the Optical Neuritis, I had a few sign orders to get out for people. Since it is nearly 3 months later, I felt really guilty. So this last weekend I got the 8 signs cut out and I am just painting them and I hope I can get them into the mail by Monday.

On top of all that, my son started a new school today which means the last week was spent trying to co-ordinate some new before and after school care for him. I am catching up though. I have nearly all the legs cut for the 10 chairs I owe my daughter's daycare. I should probably build them 12 so it will be the chairs plus interest....

Now, of all things, I find Christmas sneaking up on me. I have so much to do between now and then. We have a money tree to plant, grow and harvest so we can afford to buy presents for everyone. We have very little spare money, but Christmas IS coming and we will be seeing lots of family this year. I hate that I can't afford to get everyone sure fancy awesome stuff. :-(

So, dear readers out there, I am not lost and gone. I am simply busy with life and working out and building and kids and a million other things keeping me from actually turning on my laptop for days at a time. Bear with me because soon I will have some photos of the chairs and maybe even the signs to post. Have a great crazy December and I hope to check back soon. Or at worst, check back this weekend with an update.

Happy Building!

Wednesday, November 9, 2011

For Anna at Knock Off Wood

So we all know that in addition to designing my own furniture and castles, I do love Anna's website for inspiration and ideas. I have used a couple of her plans lately so I wouldn't have to work through it myself. The dining room chairs are one of them. Well, I modified her wonderful plans to accommodate our slightly larger frames. As my readers know already I have 4 of the original chairs built and we have dubbed them the "Kid's Chairs". I modified it to be wider and taller backed for comfort for us curvier adults. 

Per her request, she wanted to see my cut list. Below is the original plans and my modifications. Oh and Anna, great job on the Momplex!!!


Anna's Original Cut List (For Chair on Left)

2 – 2×2 @ 18 1/8″ (one end cut at 15 degrees, measurement to long point)
2 – 2×2 @ 15 3/8″ (one end cut at 15 degrees, measurement to long point)
2 – 1×2 @ 16 3/16″ (one end cut at 15 degrees, measurement to long point)
1 – 1×2 @ 14 1/2″ (Front Apron)
1 – 2×2 @ 14 1/2″ (Back Support)
1 – 2×2 @ 13″ (Back Base Support)
2 – 2×2 @ 16″ (Front Legs)
2 – 1×3 @ 14 1/2″ (Front and Back Aprons)
2 – 2×3 @ 13 1/2″ (one end cut at 15 degrees off square, measurement to short point)
2 – 2×2 @ 16 9/16″ (Both ends cut at 15 degrees, parallel to each other)

My Modified Larger Chairs (For Chair on Right)

2 – 2×2 @ 24 1/8″ (one end cut at 15 degrees, measurement to long point)
2 – 2×2 @ 18 3/8″ (one end cut at 15 degrees, measurement to long point)
2 – 1×2 @ 19 3/16″ (one end cut at 15 degrees, measurement to long point)
1 – 1×2 @ 18″ (Front Apron)
1 – 2×2 @ 18″ (Back Support)
1 – 2×2 @ 16.5″ (Back Base Support)
2 – 2×2 @ 16″ (Front Legs)
2 – 1×3 @ 18″ (Front and Back Aprons)
2 – 2×3 @ 16 1/2″ (one end cut at 15 degrees off square, measurement to short point)
2 – 2×2 @ 16 9/16″ (Both ends cut at 15 degrees, parallel to each other)

Because this chair is larger and heavier, I added corner support (pieces of 2x3 cut with a 45 angle on each side and pocket screwed into the sides) to give extra support to the legs. I also switched from the pine 2x2s I was getting at Big Blue and instead ended up buying some cedar 2x2s for the legs from a lumber yard. They had some really nice clear grain (means no knots or blemishes) for a decent price. I just wanted to be sure those legs were extra strong. 

I have also had to modify Anna's slipcover plans to match my larger chairs.

Anna's Original Cut List for the Slipcovers

2 – 18″ x 16″ (Pieces A for Seat and Seat Backrest)
1 – 18″ x 6″ (Piece B for Front Apron)
2 – 16″ x 6″ (Pieces C for Side Aprons)
1 – 18″ x 21″ (Piece D for Back)
2 – 21″ x 3″ (Sides)
1 – 18″ x 3″ (Top)
1 – 7″ strip 12 feet long (for knife pleats, spice fabric together to create 12 feet)

My Modified Slipcovers for Larger Chairs

1 – 21.5″ x 19″ (Pieces A for Seat)  
1 - 21.5 x 22" (Seat Backrest) I had to make different sizes for seat and back because I added more height than I did width.
1 – 21.5″ x 6″ (Piece B for Front Apron)
2 – 19″ x 6″ (Pieces C for Side Aprons)
1 – 21.5″ x 27″ (Piece D for Back)
2 – 27″ x 3.5″ (Sides) This one can be 27 x 3, but I wanted that extra .5 inch to deal with possible shrinkage and to give the seams a little give since my kids can be wiggle butts. 
1 – 21.5″ x 3.5″ (Top) This one can also have that 3" instead of the 3.5, but I beg you to remember to use the 3 or 3.5 for BOTH. I accidentally did 3 for the top and 3.5 for the sides and it makes sewing the seams a challenge to say the least. Ooops. Hahaha.
I skipped the pleats since my husband admitted he thought they looked silly like a dress on a chair. HA! So I made a straight seam instead. :-)

I hope this helps anyone who wants a larger chair and needed specs. I built and sewed the chairs matching Anna's Plans. I DID add those braces, as well as extra screws to connect the taller back to the seat. This will be hard to explain, but for that joint, I did pocket screw on the inside of the seam so the screw went from the seat into the backrest. Then I did a pocket screw on the outside of the backrest going into the seat. (It wont be seen thanks to the burlap and the slipcovers). THEN I also did a couple screws straight in from the back of the chair through the backrest into the seat. Perhaps overkill, but I wanted to be sure it would be secure. Just make sure it is secure and you should be fine. For the instructions here are the links to the original plans again.


Sunday, November 6, 2011

Long Week

Much as I anticipated, I got more done in the evenings last week than I got done this weekend. Although for once I actually accomplished a little bit this weekend. Last week I managed to get the other 4 chairs framed out and the bases stained. I really meant to throw on the finish today, but that didn't happen, boo. I finished out the tops of the chairs and cut the foam for them. The only problem is lack of burlap. I probably have enough for 1 instead of 4. I need to buy some more tomorrow. 


Anyway, I at least got them that far. Nothing picture worthy so this will be a bit of a boring post, but hey, I am happy. I WILL have the chairs done this week. I just KNOW it. I can get a lot done in the evenings. I even managed to get the fabric washed for me to cut the slipcovers out. I may have even done that tonight except that I had a surprise date night with my husband. The kids went to bed and we got to relax and talk and spend time together where we have not gotten to for awhile. Probably because I work until 10pm or later in the garage each night...hmmm...very well could be that.


My list of other projects though is only getting longer. I have to finish building the windows for the playhouse. I can't keep the blue plastic over the windows all winter. It wont take but a few hours to get them done. I just have to spend a couple hours doing it. I have the Plexiglas I just have to build the frame and put them in the windows. I was able to cut the legs for 3 of the 10 toddler chairs I still owe the daycare. One of the daycare teachers has finally decided on a table, bench and chairs that she wants, so I can get started on all of those too. I really wish I had 2 weeks off just to work on all of these projects. It would feel SOOO nice to have them all done and accomplished. At yet, I am still dreaming of building so many other projects. They wont leave my head and tease me and make it hard to finish one project without wanting to begin another one!

But first before all of those, I have to finish my chairs. I also need to get 3 or 4 signs done up for some ladies from my mom's group before Christmas. I want them done sooner than later so I have them slated to be done this week along with the dining room chairs. If by Friday I have both of those things DONE DONE, I will feel really good going into next weekend where I can begin cleaning and planning for Thanksgiving.

Now if only I could do all that and still get more sleep.......yeah.....not going to happen sadly.

Sunday, October 30, 2011

Frustration

I am getting NOWHERE. I know that is a bit of a hard leading line, but I feel that way sometimes. I was happy to give up my Saturday for friends and fun at the pumpkin patch (which was a real blast actually), but I am frustrated I didn't get out there and built the other 2 chairs. Seriously. It IS my fault I didn't work late on Friday night on any of this, but today was hard. I had to be responsible and an adult and sort laundry and clean and cook. Blah!

I did buy the extra 2x2s for the other chairs, but no cutting happened. I ended up sewing and that was it. I hate sewing. My sewing machine is cranky and not co-operating. I also ran out of thread and I just feel like whining. 

Since I have nothing nice to say, I wont say anything at all about this part of the weekend.

It appears I will only be allowed the time to work on this stuff during the week and not on weekends. I understand. So this last week I managed to build 2 of the 4 larger chairs. Or at least the framing of them are done. I made them wider and deeper and raised the back up a few inches as well. Here is a comparison of the size. Please forgive the mess. I DO have to do all of this in the garage and my woodworking is not the only use of the garage so I deal with the mess too.

These are the "captain's chairs" as my husband puts it. We are debating exactly how we will arrange them at the table, but it will be an experience either way. I put the chairs side by side so you can see the difference in height and depth pretty well. Naturally I will also be covering the larger chairs with the same 2 inch foam on the seat and 1 inch foam on the back. I also splurged on some 2x2 fir and I am going to replace the legs with this because it is a much nicer and stronger wood than the 2x2s I have used so far. 


Perhaps with luck, my evenings this week will be more fruitful than my Sunday has been. Happy building folks.

Sunday, October 23, 2011

48 Hour Days

I know you have all felt this way at one time or another. Where you have so much to do and so much you want to do, but there are only 24 hours in a day and it's just not enough. Yeah, that was my weekend! 

First off, here is a bit of happy news for me. I got my eyes checked on Friday and the doctor says that while the optical nerves are still asymmetric (so there is still a little swelling in the right eye), it is a lot better than before so there is improvement. I believe I am close to 99% of normal and while the color is still dimmed through my right eye, I am happy with the progress. The doc said that I have had great improvement in a very short amount of time and that indicated there is a VERY good chance in the next month or so as my eye continues to heal itself it may even recover completely! Wooohoo!!

The down side to having your eyes dialed on a Friday afternoon, is that your eyes are wonky for that evening and it means I lost one more evening of work time. Oh well. Saturday I was able to get the bases for the first 4 chairs stained a Dark Walnut to match the table. I spend the better part of that day cutting and sewing the slipcovers for the 3 chairs. I worked as long as I could, but somewhere in there I have to sleep. :-(

Sunday brought with it cleaning by everyone in the house which makes me super happy. I LOVE it when my house is clean and it seems to so rarely be super clean anymore. It's hard with our schedules to find the time and energy to clean house when there is so much else we would rather be doing. We also had our good friends over for lasagna and pumpkin pie. I literally was cooking pie, prepping lasagna, and finishing the sewing of the slipcovers and cleaning all at the same time tonight. I really wanted to be able to sit on the first set of chairs tonight at dinner. I managed to get 3 at the table. The 4th needs to have a couple more pocket screws put in so I can attach the top and bottom. I LOVE how they turned out. I still need to do the final hemming on the bottom of the slipcovers, but they are looking good!


Coming soon will be the other 4 slightly larger versions of the same chair. :-) 

Monday, October 17, 2011

I am ALIVE!!!!

Hello!

After the 5 days of annoying IV meds, I thought I would be feeling better. What I was not warned about was the side affects of the medicine leaving your body is NOT FUN! I actually called the doctor thinking something was wrong because my whole body hurt and my skin on my chest, back, shoulders and even my ears hurt. Everything felt like it was bruised and I wondered if I caught the flu along with everything else. Turns out it is the normal process of the medicine. One more reason I truly don't want this to ever happen again. Once I took a day or so off work to sleep and rest, I started to feel human again. This was last Friday when I finally felt good again. I was ready to attempt to get back into the garage and make some sawdust. I had a slight delay as we watched our friend's kids while they took care of some funeral arrangements. 

Then came Sunday. I was ready to beg/plead/cry/anything to be able to get a few hours of ANYTHING done in the garage. I felt a lot better and I was ready to see what I could do with my eye (I will explain in a bit about that). Luckily my kids were in a calm mood and wanted to spend the day coloring and reading books with Daddy. 

I can't begin to tell you how I felt stepping out into the cold garage. I wished it was warm like summertime, but just getting out there and breathing in the soft smell of sawdust. I stretched and looked around. To warm up I did some rearranging and cleaning of the garage. I got my new workbench into its new position and got started. I was building the last bit of Anna's parson's chair

I had already built the basic form of the chair. Then I got sick. Since that was so long ago, here is a little reminder.


It sat there looking so close to done and taunting me as I was sick and not able to work. Anyway, I took those out to the garage and did the some more. I started by adding some 1/4 inch plywood to the seat and back. This would give decent support to everything. then I used spray adhesive to attach the 2 inch high density foam to the seat bottom. There was some old 1 inch foam left hanging around from when I took apart the old breakfast nook so I used that for the back cushions. I wrapped the whole thing with burlap to smooth it all out.


I really should have folded the foam over the top of the back. I forgot this step when I did it. I WILL do that on any future chairs. The top then met the bottom. :-)


Look Ma, a real chair! Okay, so we all took turns sitting on it and seeing how it felt. Everyone agreed it was comfortable, but it is a smaller chair. Our old chairs were huge and I always thought they were too big. But this just made this chair feel so small. It was comfortable (more than our old chairs) but the seat isn't very big. I worry I would rather have it reach all the way to the back of my knees instead of mid thigh and while quite supportive, my husband and I are a little wider in the hip than this seat. You don't feel awkward sitting on it. It is just smaller than what we are used to. It didn't help that without dining room chairs we have been using computer chairs which are huge and comfortable and more like sitting in a rocking chair than a dining room chair. Everything feels smaller compared to them.

I decided to finish the chair anyway. Even if I make modifications to future chairs, this one is plenty big for either of the kids with room to grow so it wont need to be disassembled or anything. (Why can't I ever use the word disassembled without hearing "Number 5 is ALIVE!" in my head. Darn movies). I followed Anna's slipcover pattern for sewing a slipcover for the chair. I used the extra fabric I had on hand from when I was building the bench that sits on the other side of the table. 

Here is my first attempt at sewing a slipcover!


So this is where I want to talk about my eyes. After steady improvement the first few days of the IV meds, my eyesight stopped improving at about 95% of my original site. With my left eye closed, I can feel and tell things are not quite right. Light seems brighter, or rather like someone turned up the contrast so I get more glares off of things. There is still a ever so slight haziness which makes me feel the vision is off. I was VERY careful when I went into the garage because I didn't want to take chances with things. The doctors can not say for sure if I will ever get my vision back to where it was before the optical nerve swelled. I am happy to report that while woodworking I didn't feel limited by anything and thanks to guides and settings on the tools, I felt confident that I was following along where I wanted to go.

Sewing on the other hand was a challenge. I LOVE this fabric, but if I moved it quickly the pattern seemed to throw off my eye. Like my eye couldn't keep up and took slightly too long to refocus once it was moved. So if I went slow, I was okay, but anything too fast and I could feel it. It was also hard because I didn't have any of my fabric cutting tools that I could find. So I was using a large woodworking ruler to mark off the fabric and it was hard to be precise. I felt myself squinting and really having to work hard to draw the lines and cut straight. Sewing again seemed easy enough since I just had to do straight lines and keep it 1/4 in from the edge which matched the edge of the sewing machine foot so I had a guide so to speak. 

So the consensus is that for now, woodworking seems to be okay for me, but cutting and a lot of detail cutting of fabric is best left to earlier in the day when I am not as tired and maybe my eye can focus easier. It did fit and looked wonderful, but it was hard and I felt a bit let down by my eye. I go back for a checkup on Friday to re-dilate my eyes and check to be sure the swelling of the optical nerve is gone. I hope it is. I don't think I can handle more medicine and lost garage time. There are precious few weeks between now and Thanksgiving. If we are going to host the whole family at our house this year, we NEED CHAIRS!!!! 

Sunday, October 9, 2011

Still Stalled and Blurry

After an MRI and tests, we have confirmation it was a random swollen optical nerve. I have been doing a 5 day series of IV steroids to bring down the swelling. This is helping a lot. I was down to barely 10% eyesight left in my right eye with lots of pain on Friday. Now after 4 of 5 treatments I can move my eye with no pain but I still only have maybe 75% eyesight. That is an improvement, but I want it all back!

The problem mostly lies right now in that I am having more trouble just making it through these 5 days. I will be honest and say I have lost my temper and whined a lot more than I normally would have. To start with they said I would get a "heightened sense of euphoria" with the meds. I did not. Instead I seemed to get the angry aggressive feelings instead. Not fun for me or the family. Then I lost my sense of taste as well ruining my meals, and my attempts at comfort dessert.

They wanted to just do one IV for the whole 5 days. Naturally the best vein was in my right hand. So I lost my dominate hand since we left the open line in there. But it started to hurt where they left the IV in so we took it out today before round 4. Today was training day at the docs and one nurse I had tried 2 times to put a new line in my left arm. When both failed, a different nurse tried and also failed for a line in the left. So I ended up with it back on my right side forearm. This has made me further whiny because my left arm aches and my right is even more useless than when it was in my right hand.

I have been writing all this left handed and it is taking FOREVER to get this much out. I prefer to be calm and just deal, but this has been more than I can take calmly. I hate feeling this lame. Boo!!!! I am hoping soon to be back up to snuff and then gorge myself on woodworking projects and getting caught up on things.

Tuesday, October 4, 2011

Time Out, Eye Out

Please forgive me for no new updates. It appears that I have a swollen optic nerve. As such, I can barely see out of one eye and am in a lot of pain. This also means I don't dare use power tools until I have 2 healthy eyes again and I can be sure to be as safe as I can be in the garage.

Thank you for your patience as I go through the doctor's tests etc and figure out how to go forward.

Happy building to those still functioning with 2 eyes! Be back soon I hope.

Wednesday, September 28, 2011

Finished Bench

I finished the bench order and I am only waiting for the pickup. This makes me happy to be able to finish it up and clean up and move on to the next project.

But first. Here is the bench all shiny and pretty. The first picture is with my cell phone so not as clear. BUT, it does show the color better than the others. The flash for some reason makes it look a bit reddish when the stain is a dark walnut and not red at all.


If you look really carefully you can see the pocket screw wholes I used to attach the middle brace. Can you see it? Those tiny ovals at the bottom? At least I know they don't detract from the look since you can barely see them.


Next I REALLY need to start my chairs. I also REALLY need to clean out my garage a little and get more than a thin path to walk in there. I have decided to base it on Anna's Parson Chair plans. I don't know if I will use her plan exactly as it is, or if I will find myself changing it a little like I have her other plans. Either way, it has been a crazy weekend with my daughter's 3rd birthday party, drama at work and a raging headache that just wont go away. I am looking forward to the weekend coming up, but I am afraid it wont be any better because I have an even busier weekend planned than my week.

Go away headache, you are sooooo slowing me down!!!

Sunday, September 18, 2011

Projects On the Rise

After finishing the sign and the last set of orders, I was able to relax this last week and only work on one project. I have a friend who ordered a custom bench and it has been fun to work with her on the design and making it come to life. Its a simple bench based on Anna's Spa Bench. Well, it started out as that and then got bigger and the trim got adjusted and this was my first attempt at making anything other than a straight piece of board as the bottom trim. 

Here are some progress photos and some of the staining I did tonight. I can't seem to get to my photos I have of the beginning of the project. The initial try at the base trim wasn't all that great, but with a little rounding out, I like it a lot better. It is not sure fancy, but the simplicity of it is really nice. 


I always try to explain to people how staining is like magic to a project. You take this simple bench and while it is pretty enough without stain (it doesn't look as good in the photos as it did in person), but check out the look with a little dark walnut stain! The backing is laying on the table in front of it. I wanted to stain it separately and then attach it once complete. It helps me to be able to reach all the way through sometimes.


And yes, I will go back and stain the underside as well. I just forgot to do it first like I normally do.

I sold my old dining room table and chairs. We now have only tables I have built in our house. This makes me happy. It also makes me desperate for chairs since we are down to the bench I had built before and some computer chairs for around the table for dinner. 

Once I complete this project and she picks it up, I have to build me some dining room chairs. I also need to build another 10 chairs for the school per our agreement. So it looks like I will be neck deep in some chairs for awhile. Hahaha. Can't complain though. It is nice to be busy.

Saturday, September 10, 2011

Enclosures

After delivering those tables and breathing in and out for a day or two (with much guilt given I hate to take nights off) I had to move on. 

I dedicated this week to putting in a bid or two on a job for a bench and making a sign that was ordered a month ago. Luckily she was VERY understanding about my schedule. August is always my busiest month for travel, prepping stuff and life's twists and turns.

I was able to get the sign done with a very cute result. It is curing right now and will be in the mail first thing Monday (first thing being lunch time at work).


With the sign finally done, I was able to do some housework (shocking right?). The kids had WAY too many clothes in their dressers that were too small for them. So we made a HUGE pile to give to goodwill, we cleaned the playroom and got the house vacuumed. I didn't get the garage cleaned out, but hey, you can't win them all!

Tonight after a movie with the kids and their bedtime routines, I headed out to finish what I could on the enclosure. Thankfully my husband had read online how to cut plexi-glass with a jigsaw instead of the score and bend thing ( I did that before and always managed to break it in the wrong place). With my jigsaw I was able to finish up the enclosure pieces. I took a picture right before the sun was all the way down, and then I installed the last piece of plexi-glass on the left side after dark so I didn't get a picture of that. I am mostly happy with how it came out. I wish the screws were countersunk just a hair more, but I think I will end up putting trim over the edges just to give it a more finished look. 


I really like the trim piece at the bottom. It makes it match the top of the tower more. You really have to dig the light I pulled out there and set on the ladder as a make-shift spotlight so I can work just a tiny bit past sunset. :-) 


Tomorrow I have that order for a bench to begin and another work week to dread beginning. 

Sunday, September 4, 2011

Tables for the Chairs

I am happy to say that I have finally finished the tables for the special order from my daughter's daycare. I hope they hold up against the abuse the kids can put into them. The best part is that it means I can move on and tomorrow I am allowing myself to work on the castle playhouse again. At least for the one day. After that I have a couple of small orders to do for friends.

The tables are done! They do look wet in the photo, but I had just put another coat of finish on there. 


Please ignore my brown excuse for a lawn. I am not very good with growing things....especially grass.

Anyway, tomorrow brings the hope I can finish enclosing in the porch area as well and hopefully putting in the screens in the 2 little front windows. I am not delusional to believe I will get enough time to build the windows I designed for the plexiglass, but at least I can get the porch area done. That will take a load off my mind at least. I can't believe its been all summer trying to finish the castle. Oh well, wish me luck!

Thursday, September 1, 2011

The Anatomy of the Chair

LOL, I so rarely have proof of people reading my blog, I can't help but jump at the chance to respond. I have been asked about these chairs I made. I started out with Anna's kid's chair plans... 4 Dollar Stackable Chair I built one chair like this, but then I wasn't 100% pleased with those front legs. Then I saw one of Anna's Fan's post a Brag Blog with a chair that seemed to be a cross between the 4 Dollar Stackable Chair and the Clara Table leg style. I love the Clara Table, but the Stackable Chair just didn't match it. Plus, I was asked to build 10 of these chairs for my daughter's preschool. This meant I needed them to be super sturdy and safe for rowdy 4-6 year olds.

Here is the chair I came up with. The flash wouldn't go so this is not the best photo. The legs are made from 2x2s and the seat bottom, side aprons and back support are all made with 1x3s. The chair is 26 inches tall overall, and it is 15 inches from floor to top of the seat. These measurements came from the height requested by the preschool owner.

Front Legs - 2x2 - 14.5 inches long
Back Legs - 2x2 - 26 inches long
Front/Back Aprons and Back Supports - 1x3 - 9.5 inches long
Side Aprons - 1x3 - 10.25 inches long
And a total of 34 pocket screws - Wow!


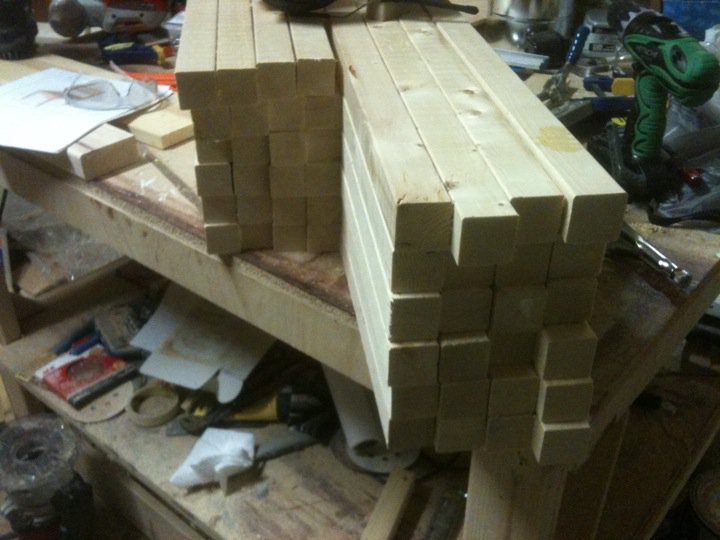
I started by cutting all the pieces. The front legs are 14.5 inches long, the back legs are 26 inches tall, the front/back aprons and back support are 9.5 inches long, and the side aprons are 10.25 inches long. I like to use jigs and stop blocks to help me cut them all even. I have my miter saw on a stand and I clamped a board in place at the right distance out so that I would only need to set my wood in place and cut without needing to measure and mark each piece. This is such a time saver people!

In order to center (sort of center) my 1x3s to the middle of the legs I used a jig. I found a piece of wood that was 1/4 of the height of the 2x2 while it was laying on its side. Or at least close to 1/4 the height. Then I could lay my apron on the piece of scrap wood and thus centering it on the 2x2. I cut pocket screws into all the boards before assembly. That took HOURS. Mostly because I have an older drill who's batteries are just not holding a charge longer than a few hours of pocket whole drilling. Anyway, over the course of 2 nights I got that done. I screwed the front apron to the front 2 legs. So the pocket screws looked like this. I used 2 inch pocket screws. That may be too long, but I wanted to be sure they wouldn't budge or wiggle under squirmy kiddos.


I then attached the side aprons to the back legs. The tricky part was to create a jig to insure I was screwing the side aprons at the right height so the chair would be level. I think I took a spare leg and clamped it to the table and then laid the long legs next to it to mark where I needed to attach the aprons. Then I attached the 2 sides to the front set of legs/aprons.

They looked a big weird, but that was okay. At this point the 2 back legs did NOT have the back apron in place. This is because I wanted to be adjust things a bit and be sure of levelness before attaching it. This is where I made many mistakes and got VERY frustrated. I have a large drill. This is a small chair. Want to know what drill wouldn't fit into the bottom of the chair to screw in the last few screws. ACK! I ended up doing something where I took it apart a little so I could screw the back apron into the 2 back legs and THEN screwing them to the from legs. My drill DID fit the other direction since the chair is deeper than it is wide. FYI, the back apron is not centered in the 2x2s, but rather is tight to the inside of the legs. I did that so the back of the seat would be flush with the back of the apron. It just worked that way with the measurements.

The seat of the chair is made from 5, 1x3s at 12.5 inches wide. This would make the corners flush with the front legs, but in between the legs you would have an overlap because I centered the side aprons. I again used my router to round off the tops of the legs. I knew I would round over the seat and I didn't want a rounded edge of seat against a squared off leg. Just a personal preference. It worked because I like the way the top of the legs look.


I liked the look so that's why I did it that way. No particular reasons sometimes. Especially when I am building from scratch with no real plans, I just go with it until I like how it looks and feels. I again used the pocket screws and screwed the 5 pieces of the seat together. Anna's plans do not have them attached like this, but I like a more solid seat and not have gaps. I have a fear of bugs crawling through the gaps in the chair seat to get at my booty. Its not rational, but it is why I designed my chair this way. That is the beauty of having no solid plans.


The seat is not a perfect square. I cut out notches at the back so that it would wrap around the back legs and go over the back apron. I wanted to be able to screw the back of the chair to that back apron so I needed it to go back that far. I just used my jigsaw and cut out the notches and then used my palm router to round all the edges on top and bottom of the seat so there would be no rough corners or edges.


I then attached the back supports. I just sort of set them in using a scrap board for a jig to keep the spaces even. I don't know why, but I didn't want to do 4 screws on each of the back supports so I did 3. 2 would have let them rotate so I did 3. I flipped them so that the side with 2 was not on the same side for both supports. I filled them with stain-able putty and let them set before sanding them down and staining.


Hours of sanding, staining and finally shellac-ing and I have 10 little chairs ready to go to school. Tomorrow I have to finish the 3 tables which I doing using a cross between the Clara Table style and the support system of the Farmhouse Table of Anna's. I can't help but change every plan just a little.

I know this was WAY more information than just the dimensions, but I am proud of my little chairs. They were a challenge in many ways, but I learned a lot too. I made the chairs so sturdy, I can sit on the chair and lean back slightly and it doens't creak at all. I wasn't too rough with it, but these kids are 1/4 of my weight so if I can sit on them (and I do for tea parties with my daughter) then it can handle the kids.

Sunday, August 28, 2011

Back from a Break

I took a little break. I have been going nearly non-stop for a long time. Practically this whole summer....wait, YES, this WHOLE summer. Anyway, so I took a long weekend and we went to Seattle and stayed with some friends. We did the Space Needle thing, Pike Street Market, Some Music thingy I can't remember the name of as well. We celebrated our anniversary and got to see my best friend which was wonderful!

But, we all know me, so let's just say I didn't leave woodworking behind. I took my tools with me and did a quick mini-training with her on some of the tools as we built a picnic table for her daughters. To thank her for letting us stay with them, I brought up a pair of chairs and a small table for the girls. They wanted an art table so I made them one.


I think I built the table in one evening the night before we left. LOL. Nothing like waiting until the last second!
I left it untreated so she could decide about paint or stain herself. I love doing stuff like this for others. The picnic table turned out so adorable as well! It is just the right size for the toddler age group. My friend did such a great job! I only wish we had more time to go over more tools and build a few more things. Oh, and there is a second piece of wood on each side for the seats. All the pictures I have of the finished table have my friend's daughter and herself in the photo and I can't post it without their permission, but you get the general idea of how the table looks. :-)


Alas, I did have to come home and I had to get back to those tables and chairs for my daughter's new daycare. I took a night or two in order to just cut all the wood I needed. Man, there were a lot of little pieces I had to cut and drill pocket wholes with the Kreg Jig. Hours of doing that each night!


In the end I did a sort of assembly line where I did each step for all them instead of building each one and then moving on to the next one. I think this saved me time. For awhile I had just the legs and supports sitting everywhere and then I had them semi-stacked for a bit.


Sure looks like a lot even though there are only 10. I didn't say anything before because the chairs I brought to Seattle were a surprise. I really only had to build 10 chairs, but I built 12 specifically so I could bring a set up to Seattle with me. :-)

This weekend flew by. Probably because we blew practically the whole Saturday at the fair. We all need a break and it was so nice to go and walk around with my husband and just peek at all the booths. But today I really hunkered down and spent hours sanding them down and staining them. I just need to put a clear coat of shellac or varnish on top and they are ready for school.


I did not however get around to building the tables. I just didn't have the time before the sun went down. Instead I spent the time after dinner (I knew I had only 30 minutes of sunlight left) and started to build the enclosure for the patio on the playhouse. Previously I needed the saw to cut the windows, and I did actually borrow it from our friend. This made it so much easier, but both of my shoulders were sore for days! I did this all before we left for Seattle.

I worked well into the darkness to finish this up. It got so bad I resorted to using a spotlight to do the final touches. The wood piece through the middle is the support for the roof of the enclosure I am building.


I also got the beginnings of the door done. I have it hung and re-hung after the kids ripped it off by accident. I should have told them I wasn't done with the door and to be careful. Ooops. I do love the color though. A nice blue to offset the grey.


Here is the backside of it. I have to decide if I want to put another piece of the other side or leave it looking like this to the inside of the playhouse.


All in all, I am getting things done. I just hope I get the thing done before winter at the rate I am going! Let's hope I can finish the tables this week so this next 3 day weekend can be spent finishing up some more of the enclosure of the playhouse as well as the windows too!

Sunday, August 7, 2011

Where Did My Weekend Go?

You know the feeling on Sundays where you have NO IDEA what you did on Saturday? I am having one of those moments. I know I was home all weekend and yet, I look around and nothing is done. The house is slightly cleaner, but my projects sit there mocking me in their half finished state. I am at a standstill with the castle right now. Partially because I need to borrow a tool from my friend to finish it, and partially because I had to do some contracted work on the side.

I did manage to do one small thing in the playhouse this weekend. My poor husband worries a lot about splinters. The straight wood that was the tower's second story floor worried him. So I decided to cover it with flooring. I use opportunities like this to try out new things. I have always wanted to try peel and stick tiles. It seems to nice for small places that do not need fancy floors or real tile. This seemed the perfect time to give it a whorl and see what it was like. $14 dollars and an hour and a half later, I had this....


Not too bad for a first time with this stuff. Now its really comfortable in there and really easy to clean. :-)

My daughter starts in her new preschool in September. It is the one her brother went to when he was in preschool and where he went this summer for summer camp/daycare. The owner asked me if I would make 2 kid's tables and 10 chairs for the preschool. I said sure. I have some great plans from Anna White's website I could pull out and do. I was already making a couple kid's chairs for the playhouse when she asked so why not make 10 more?

I mashed up a couple of the plans Anna has for chairs, and came up with this style of chair with 2x2 legs for stability and strength. They DO have to hold up to 6 year old kids leaning back in them (even though leaning back is not allowed). This is actually my son's for the playhouse. I am using my router to cut his name into the back of the chair's support piece. That is why it looks like a piece of the back is missing. I misplaced my router's bushing so I couldn't finish putting it together. All the screws are hidden because I used my Kreg Jig for pocket screws. I sat in the chair and leaned back a little and nothing broke so that is a good sign it will be able to handle a 6 year old....hopefully. hee hee.


I took nearly all day today designing this chair. It is a fast build, but I was sort of making up the design as I went along so there was some delay as I worked through each step. Then tonight after the kids went to bed I went back out there and cut all the legs for the 10 chairs. Ended up with extra wood so I cut more legs. I will be able to make 12 chairs total with the 10 pieces of wood I bought. I HAD hoped to have all the chairs built this weekend, but changing up the plans at the last second really slowed me down.


Let's hope this week I can borrow the saw from our friend. I REALLY want to be done with the windows soon!

Sunday, July 31, 2011

8 Weeks Now

It has been 8 weeks since I started building the castle. I had hoped to be fully done with this project by now, but I am still enjoying every moment of building it. Most of these last 8 weeks I have worked nearly non-stop on it. This weekend was a little different. We went to a friend's BBQ party on Saturday that was from 2pm-8pm. So yeah, I didn't get a lot of work done that day obviously. Today we went to the park and a million little things that kept me from getting out there. I DID get a few tiny things done though.

First of all during the last week I did get a little of the trim done. Mostly because I took my daughter to the doctor's office one day and took the rest of the afternoon off. She was tired and slept all afternoon while I got this trim done. Add a bit of sunshine to quickly dry my layers of paint and I was able to make fairly good progress.

First off, I trimmed out the screen window I installed last weekend. It is WAY less ugly now. :-) In fact, I quite like it. I put in the waterproof caulk around the edge and it looks pretty schnazzy.


Here is a close up of the window. I basically made a square frame of wood and wrapped the screen around it and stapled it. Much like covering a footstool with fabric. I put the trim about 1/4 of an inch back from it. I thought the fact the grey screen material covers the white of the frame it would look odd, but since the castle is grey, it actually makes it look like it was supposed to be this way.


As you can see, the kids think the windowsill is actually the car garage. I think its cute, so I let them leave them there. I will move them when I make the second part of the window with the Plexiglas.


I was able to build the second screen window for the other side of the castle. The large window in the tower. I still need to finish caulking it before adding the trim, but at least I can stop worrying about the kids falling through it!


Here is a close up of the screen window. You can see it is just a simple frame of wood with screen material wrapped around it. I just tapped it into place and then screwed it to the window frame in 8-10 places. A bit of overkill, but I feel safer knowing its not going to be easily pushed out etc. The frame will cover all the white window frame and come over the screen frame leaving about 1/4 inch showing.


Finally this weekend I started the interior trim work. I have one piece left to cut since I biffed the other one I had for that spot. Wont take long...maybe tomorrow night.


As a final attempt to accomplish something, I also got the piece of wood cut to enclose the stairs. For fun, I decided to paint the piece yellow instead of purple. Just to keep it colorful. I was thinking of maybe adding some stuff in this area. Like a magnetic board with letter and numbers. Or animals, or I don't know. Just to keep each room with a play area I guess. I still want to add carpet to the stairs just to make them less hard on the hands and knees when crawling up them.


Every weekend I think "This is going to be the last weekend". And then it isn't. I feel like I can never get anything done. And yet it IS getting done. This week I hope to make some progress on the sun room and the final trim work on the windows. Stay tuned!