Sunday, December 26, 2010

Possibly Done

They say to never bring anything inside until you are sure its done-done because otherwise you will play with it and then never complete it. That could be what is happening here. I brought the dollhouse inside because the kids wanted to play with it and we wanted to see how it looked in the room.

But I get ahead of myself. First I should show you what I did since the last time you read my blog (assuming anyone actually reads this). I painted the whole thing white.


Then I cut out and painted all the pieces for the background. I didn't actually get around to painting the top piece for the attic. My husband wants it wood colored and I wanted red. Thanks to Christmas we were unable to get out and buy any paint for that part. We had bought a small thing of purple for the bedroom, but I didn't think about needing some red until the stores were closed.


For the kitchen area I added some peel and stick tile. I wanted it to have just that little extra bit of coolness. :-)


Now, this is where I made the mistake of bringing it inside. I still needed to finish the attic and finish painting what furniture I had. But our friends were over and the kids were restless so I figured why not bring it inside. Which means the other plans I had for it like the crown moulding in the bedroom or painting on windows and art work hasnt' happened. Who knows if it ever will. Its so hard once the kids are playing with it and not noticing those things not being there, to actually make the effort to do those finishing touches.

Since I do have the attic piece of wood cut, that WILL get attached and the whole unit anchored to the wall, but we will see how long that takes me to do. I just need a little bit of red or stain it or something and nail it in there. :-) As you can see, chaos ensued after I got it inside. They had other dolls and all kinds of mischief happening before I could even get the furniture in there. Oh well, they are happy so I am happy.


Thursday, December 16, 2010

Some Changes

Robert wanted to have me change up a few things. So I did. He didn't feel the attic was large enough. So I lifted the roof a good 3-4  inches. I have also finally built the railing for the patios. Its taking a long time to do each little step, but its good work and it feels good to have stuff done. Sometimes its hard to do all the sanding by hand and designing as I go, but I am happy with the progress.

Here you see the raised roof. As you can see, I did a little boo-boo. I was twisting this around accidentally hit the basketball hoop and broke the glue on the whole roof structure. The nails kept it in place, but I needed to hurry and build the railings to support the attic.


My goofy husband helping me illustrate the height of this massive dollhouse!


This is my tester railing. I wasn't sure on the design. In the end, I simply can't do better. I don't have the money (hence me making this all from scrap wood) so I had to do what I could do with my own skill, as low as they are. Anyway, my skills are minimal at best, so a boring simple plain railing was all I could make happen.


What a lucky find in my wood box. I had one single piece of trim left that was a nice full 8 feet long. It was already while too which is great since I will be painting a good part of the dollhouse white. :-) It was JUST long enough to wrap around the bottom of the dollhouse.


So, I know these pictures are out of order, but I just didn't have the energy to load them one by one. I got more of the railing done and decided to set some of the doll furniture into it just to see how it would look. Can you say CUTE!!!!! I am loving it. I MAY have to spend some time playing with the dollhouse once its built. I never had a dollhouse growing up.


The overall look of it before I lowered it to the ground. It was just getting too tall for me to work on while still on the table.


A close up picture of the furniture. Is this just the cutest patio ever!!! Okay, some day I need to build a life size room. I really do! Here you see another little boo-boo. Between the tester railing I used to show Robert what it would look like and the final sets of railing, I must have changed the width of my table saw and stop block. Oops. The new railing on the side and back are just a HAIR wider. Oh well, nobody said I was perfect.


I do love this patio!!!


Wednesday, December 8, 2010

What Comes Next

Apparently its not the next ROOM, but a whole house. Well, a dollhouse at least.  We came up with the idea on a whim. See, I had a vacation that turned out to be not a vacation.....well, that's another story. My husband says I should just play in the garage and try new things. I SOOOOO wanted to do that, but hey this is real life and I was just plain BROKE! So I say "Hey, how about I just see what I can build with the scrap wood in the garage only?"

And so the dream was born. Robert went online and found a picture of a dollhouse he liked for the kids. It's called the Savannah Dollhouse and it's BIG. Don't know if I am allowed to post the picture so I will skip it just in case. Just google Savannah Dollhouse and you will see it.

I asked Robert how big. He starts pointing and indicating and then before you know it....well....its going to be HUGE. Its going to be about 4 feet wide and about 5 feet tall. Large enough for both the kids to play with and not grow out of anytime soon. Its coming together, but there is still a lot of work to do. Needless to say this project has been interesting. I have learned that I had A LOT of scrap wood and I can be pretty darn creative when I need to be. Since I got all distracted and didn't have time to write a lot, I will leave you with with some pictures.

So far, my favorite part are the stairs. YES, they look a bit funny, but once they are painted white it will show off the walnut stained parts. I know I should have waited, but I really wanted to see how the walnut stain would come out. :-) Patience is NOT my middle name. But if it was, apparently it would be in all caps since I like to intersperse them in my writing so why not my name, right?!


Sunday, November 7, 2010

It is DONE!!!

I can't even tell you how happy this makes me. All the doors are there and close and I feel so happy!! Yes, that is a lame sentence, but I am not sure how to put into words how I feel. I have worked on this project for months. It's been a lot of hours of work and I am very proud of the result. It's by far my largest project and I seriously hope to not do another thing this big for awhile. LOL.

I present to you my simple little storage wall unit I built thinking it could just hold our puzzles and games and not be a big thing. Well...it's big...it's beautiful...and its DONE!


So now the big question is.....what's next?

Tuesday, November 2, 2010

Lost Month

I feel like I lost October. Its now November and I am not yet done with this wall unit. I am so close! Where has my motivation gone. Probably hiding under a warm cozy blanket avoiding the cold of the garage. The last 3 doors are built now. They are even stained. All I have to do is put on shellac and hang them.

Let's hope I can do this tomorrow. I am tired of not being motivated. I want this COMPLETED!!!!!

Sunday, September 12, 2010

A Tale of a Door

How pretty that door looked while it sat leaned against the unit. How disappointing it was when I tried to actually hang it. I did the hinges just right, but upon hanging it I found it will always be crooked. Somehow the weight of the TV part in the middle pulled things off center and made my cabinets not straight. So while I have a square door, the cabinet is no longer square. I checked it in so many ways and the cabinets WERE square. So is the door. And yet its not. I have it adjusted as far as I can, and its just not right.

I ended up having to attach a bit more trim on the inside under the hinges to push the door to the side which better centered it with the cabinet, but it will never hang straight.

I admit I have had a really bad evening, but it was the last straw. I had to give up. All I can hope for is that my friends and family who visit will ignore this and not sweat the details. I have friends who are always so in awe of my woodworking and say I should teach others. Well, friends, now you see why I say I can't teach it. I am just not good enough. And now I think I shall avoid building things in the future that needs doors.

Sorry, just feeling sorry for myself tonight. Nobody reads this blog, so really its only me that will notice this very off post. At least I have a record of the pictures of my little project saved here.

Here is my slightly crooked door. (silly flash was on overdrive tonight)


And here is my little fix. Without this the door comes to the left edge which makes it slightly not wide enough to look good on the right side. With these extra pieces of wood in there pushing the whole door to the right a half inch, it almost looks okay (other than the missing door handle of course.)

Tuesday, September 7, 2010

FINALLY a Door!

I FINALLY have 1 door built. It was a super pain in the booty thanks to warped 1/4 inch ply I used for the back, but I got it done. Thanks to my hubby for the final design help!

I still need to stain it and give it a handle, but I am too excited not to share it now. Its made to look like 2 doors or at least give the feeling of 2 doors. I didn't think I had the skills to hang 2 doors in each of the 6 cabinets and have them all straight. So I cheated and made 1 door that from far away makes you think its 2.

Its just leaning against the cabinet here. I just wanted to see how it would make me feel and see if I want to see 6 of these in that design.

What do you all think?!


Tuesday, August 31, 2010

Much Better

My last post talked about how there was just something wrong with that shelf. My wonderful husband came up with just the right solution. We can keep the shelf up top and make it look better by adding a back piece of wood thus making it all seem build together and not just an open shelf. Somehow he figured out it was seeing the wall that was bugging me so much. I gave it a try with a back piece and I have to say, he is SO right. I love how it looks now. I was also able to get the base trim on there finally so there is only 3 small pieces of trim left to put on there and THOSE DOORS!!!

Loving the new large open shelf up there! First the base trim!


And then my shelf. :-) I will be putting some 1/4 round trim on the right and left to cover my gaps. Just didn't have time tonight.


And the overall look. I think its time to stop procrastinating and build those doors!

Monday, August 23, 2010

Not Quite Right

I was able to get the riser done and installed last week (yup, I have not gotten around to posting about it sorry) but I didn't finish the top part of the unit. I still can't quite place what it not right. I kind of want a shelf up there, but as you can see in the pictures below, its just not quite right. We can ignore the fact that there is no front facing to cover the edge. I am just not sure that just a shelf is all it needs. I am leaning more toward perhaps changing it to a full cabinet up there. Just to keep the finished look.

What do you think? I can't even tell you how much I look forward to having the time to build some doors. I am really really really wanting a cleaner look. At least its organized with puzzles on the left and games on the right!


Sunday, August 8, 2010

What Stage Am I On Again?

I have lost count with the number of stages this project has. In any case I made some great progress this weekend. I even managed to finish this latest stage on Saturday so today we could clean house a bit, which is a nice treat for the whole family...

There is not much to say beyond it being installed and filled now. I didn't take a picture of it filled with games and puzzles, but its definitely done its job of holding all our games and puzzles in one set of cabinets instead of 3!

I can't wait to see how nice it will look one I have doors on it as well....in time...for now, I can stop and breathe a bit. :-)

Saturday, July 31, 2010

Stage 2 of Install!

I was able to install the 3 cabinets FINALLY. When last I posted some pictures I had the carcasses built, but not trim work stain etc. Well here are a few to show how I got from there to here.

All trimmed out and I covered the sides of the plywood tops with the veneer tape. The wide piece at the top of the back is so that I can screw the whole cabinet to the wall stud for safety.


Time to stain it!!


And looking at it straight on. I didn't stain the tops because they are stacked that part wont show anyway.

Now they just needed the backs put on them and after 3 coats of shellac, I put them in the house!

I am going to build 2 of the next 3 cabinets with that shelf  at a different place. The stereo wont fit in there as it is. So they shelf will either be lowered or highered to make room for the stereo. So even though there are 2 on the right side, that top one will come back down and the adjusted ones I will build will go at that level. Then this cabinet will go on top of it all. I can't wait to get the others built. Its going to look so wonderful!


Obviously the base trim still isn't on there. Not to mention the cabinet doors are not on there either. Those are next on my list of things to get done. I am having a hard time figuring out what style of cabinet door to do. I am being a rebel and instead of making 2 cabinet doors for each cabinet, I am going to make 1 larger one for each one. Saves on hinges and the trouble of hanging them straight. Let's hope it doesn't look bad that way.

Stay Tuned for More to Come!

Friday, July 30, 2010

Progress

I got those 3 cabinets into the garage and stained them. Of course I also trimmed them out and put a support piece on the back so that I can screw them to the studs for safety. Tomorrow I hope to install them. Right now they are only on shellac layer 1. I usually do 3-4 so we will see if I can get those done by tomorrow evening. Its warm out so it shouldn't take long to dry and cure between coats.

Wish me luck. Lots of pictures to follow!

Sunday, July 25, 2010

My Semi-Productive Weekend

I FINALLY had a day off. Trying to balance my personal life and work life has been particularly hard lately. I love my co-workers (when I am allowed to speak to them. When I am not at least I enjoy listening to them) BUT we don't have downtime and I have a hard time figuring out how and when I am allowed to stop and breath. In order for me to do anything (even my beloved woodworking) I have to stop periodically and just think of something else for a moment and sort of change subjects. When I am at work I will stop, text my husband to tell him I love him. In that moment of NOT working on my work it enables me to change and work on something new. I can't just go from one project to the next without a break in between. Now that I am not allowed to even send my hubby a text, I have no breaks whatsoever and I may lose my mind.

Which brings me to the balance. I have to find a way to do both work (a non stop, never ending cyclical job) and be a parent and still have time to make progress on ME and my projects. It seems as though I am having less moments in between each of these and I find myself wishing to live back in my home town of Boonville. While I wouldn't actually want to LIVE in Boonville again, I do sometimes wish for the small town feel and speed. Things are so chaotic. I rush to get going and get the kids to school so I can rush to work so I can work like crazy straight through the day (no breaks except lunch) and then rush home to get the kids so I can rush home and make dinner so I can get the kids fed, cleaned up and to bed. Then rush to the garage to get some progress made on my project, then rush to bed so I can sleep enough to get up at 5 the next morning and do it all over again....

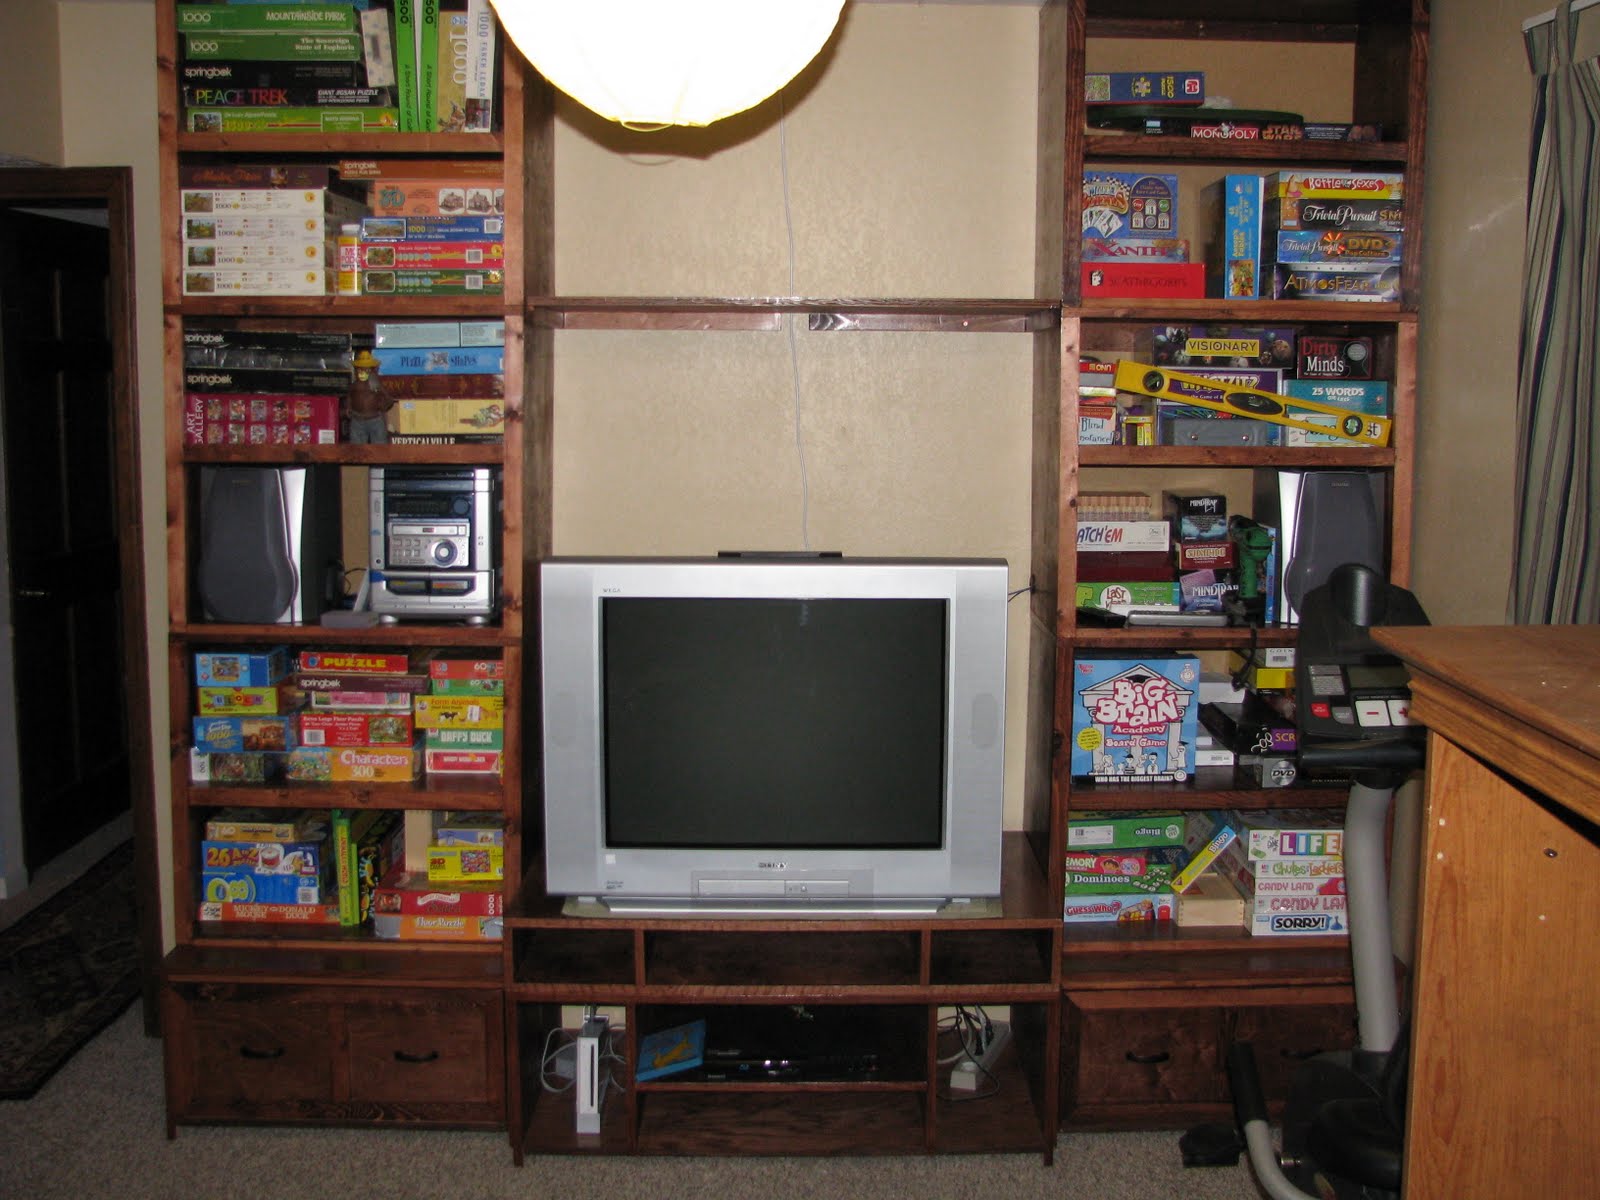
So I did it. I begged for a day off. It took some convincing and I was able to take Friday off. While I was home that day, I was able to build 3 of the 6 side cabinets. Or at least the carcass of it. I still have to put the facing on it and fill the nail wholes, stain and build the cabinet doors, but hey, I got SOMETHING done.  It was glorious. A lovely day so warm I could work with the garage door open. I spend a good part of the morning installing the 3 bases. My husband had taken the day off too (major bonus!!) so we moved the furniture from the wall and placed the 3 bases against the wall. Then we moved the TV onto it and he re-hooked up all the electronics. Other that realizing this made our TV lower than before it looks great! I am going to have to rearrange the way I was going to build the center cabinets to put something below the TV to raise it up. You can't do Wii-bowling if you have to duck to see the screen. Its fine when you are on the couch watching a movie, but standing up its too low to look straight into.

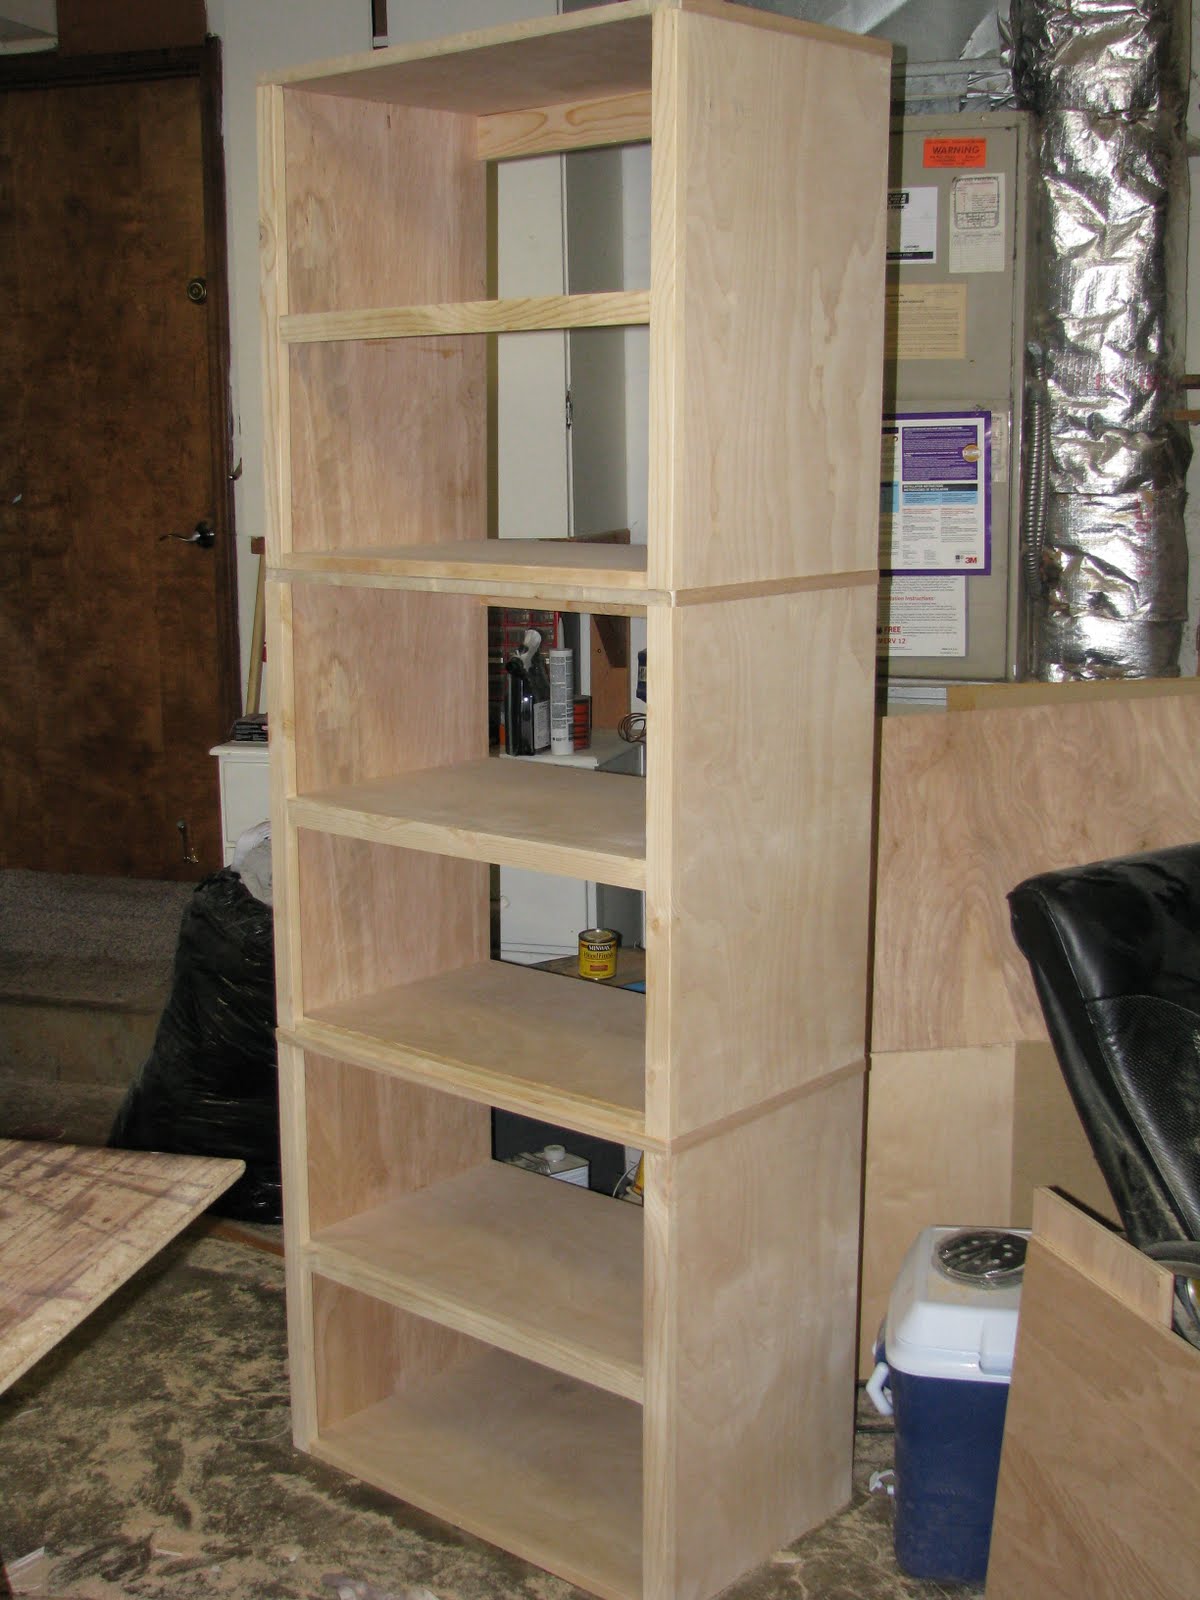
Once all of that was installed I took the afternoon and 2 sheets of plywood and built 3 side cabinets. We decided on birch plywood because my husband liked the grain pattern more than the oak plywood's grain. I actually agree so that's what I bought. The original plans say to make each of the side cabinets have 4 cubes inside. I didn't want that and so only put in the horizontal shelf and didn't put in the vertical ones. There is still a lot to do on it, but I wanted to dry fit them in there to see if I was right about the measurements. It should go to just a hair below the ceiling. Well, I think I was right!


Here I was thinking those drawers were massive, but then I put this in place...dear me I think this this is going to me SUPER massive (yes, I have such a flair for words right?). Once those cabinet doors are on (and backs and trim etc) its going to be a HUGE wall of cabinets. But as you can see, the games will fit and it will be soooo cool. I wanted to get a picture of the whole things, but really we moved everything away from the wall to the middle of the room leaving me no room to actually back up and take a decent picture. But at least you can see 2 of the 3 bases. Still no base trim because I wanted to wait until I knew exactly how it all fit together before I measured things. I may change my mind later, but if I have the trim all touching each other on the bottom, I have to have it exact. If I do a different thing with the base trim, then I can do it at any time.

Here is the unit before I got the second 2 bases built. I like how the drawer handles look. While simple they look nice and still make a statement.


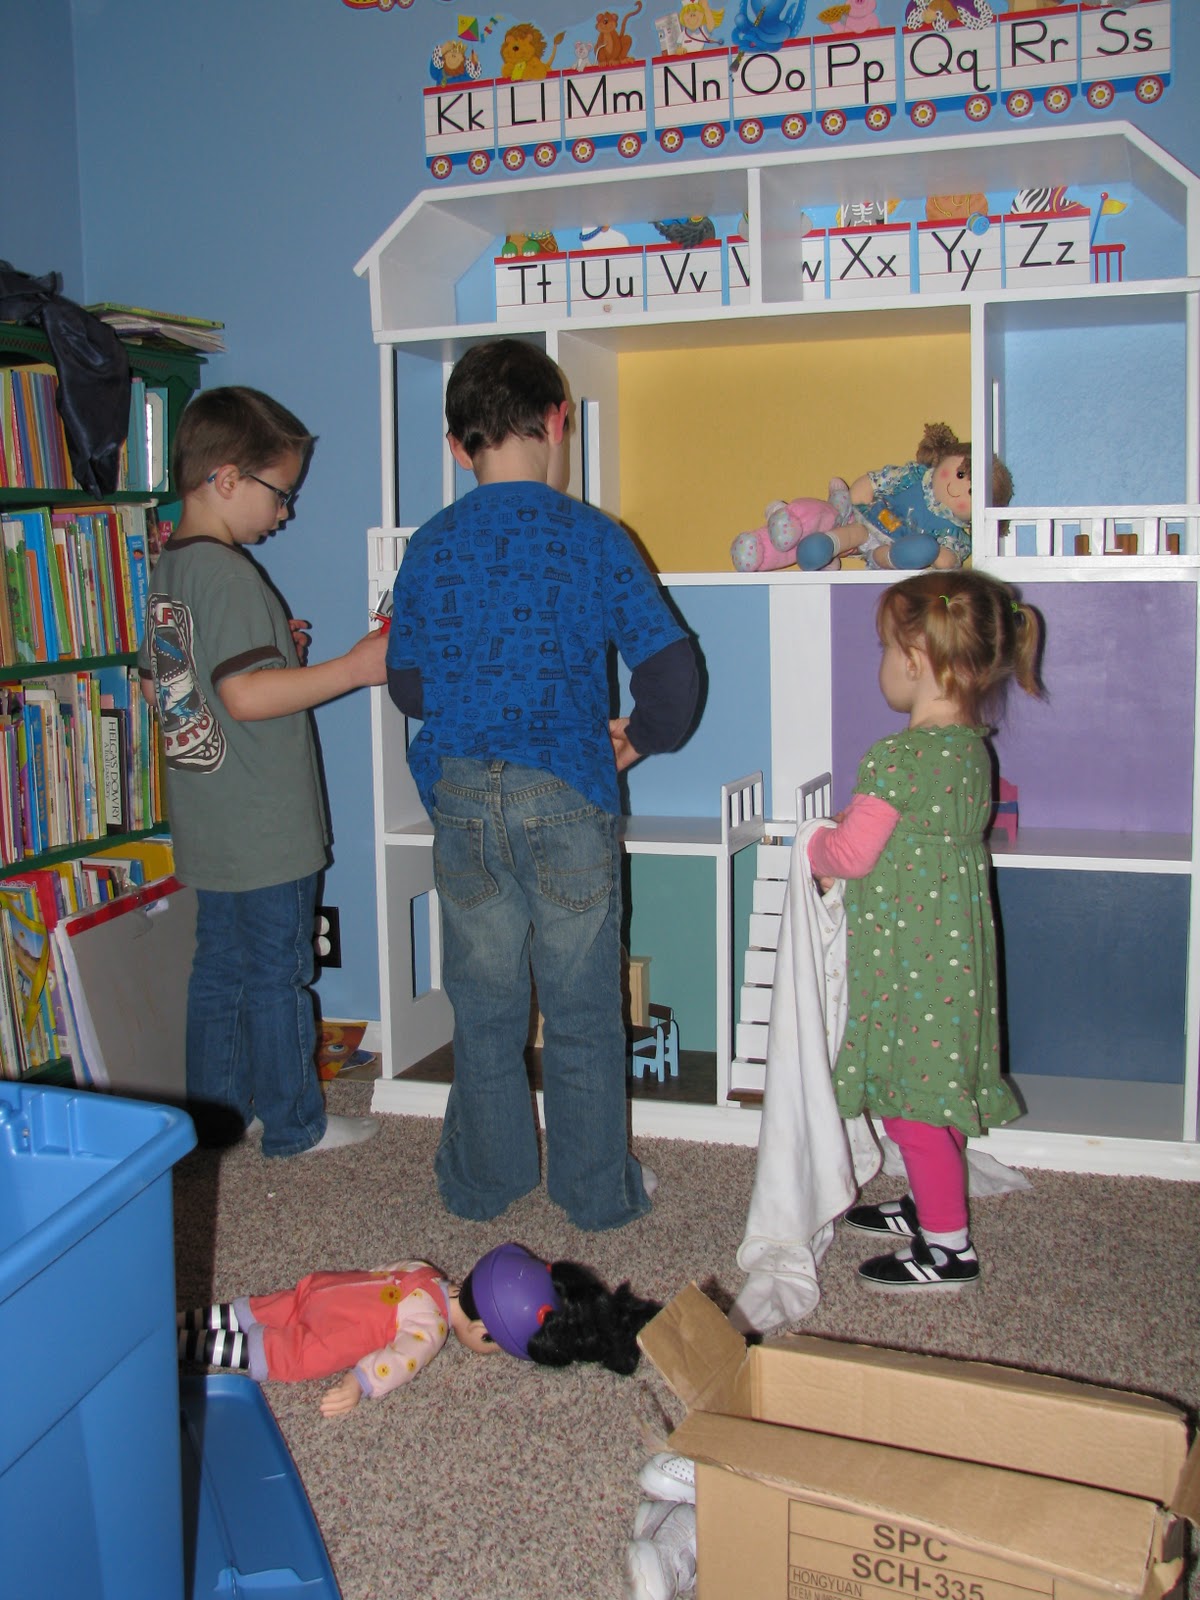
Beyond that one day of working. I really didn't work on woodworking the rest of the weekend at all. I just hung out with the family. Or rather I spend Saturday helping my son's preschool business move everything to their new location. Helped them pack up stuff and take over 2 loads of stuff. I got to hang out with my husband watching a movie or 3 which was wonderful. On Sunday we got up and played board games with my son. My daughter just wanted to push the board so we didn't have her play. My son totally beat the hubby and me. He is very nice about winning, but I was SO close to winning myself. Ah well, he's 5. It was just a game of chutes and ladders....right? hahaha

 Stay tuned and I will get more work done on those 3 side cabinets!

Monday, July 19, 2010

The Slowest Project

It seems I have spent more time dreaming on this project than actually getting anything DONE on them. Each step is taking weeks. The bases are all done, but my backing is sitting half cut because my son pulled an attitude and I could hear the meltdown of both kids and my husband from the garage. Note to self, DO NOT LET HIM SKIP A NAP! Okay, moving on....

I wasn't able to finish cutting the backing, or the trim. Just 2 tiny pieces cut for the trim, but 5 to go. Sigh. But I was close enough I couldn't wait any longer and I brought them in the house. Talk about a large entertainment center/storage cabinet wall! Perhaps by the end of the week I can actually install it......I love to dream! So imagine these with door handles (also purchased but not yet installed), base trim and backing.....

The games in the second picture are there to help us determine how deep we want to make the side cabinets to hold the games etc.


Stay tuned for base trim, door handles and backing!! :-)

Sunday, July 18, 2010

Itching

I have the 3 bases done now. They all have 3 layers of shellac on them. I want to throw a 4th layer on there and then they are ready to be installed. I am itching to be able to build the sides now. I REALLY want to start to install the whole thing, but without the sides I wont have enough storage to move the existing stuff out of the way.

I know that might sound confusing, but I'll figure something out. I am also trying to figure out how to take a trip to Seattle next month and see the sights and do a little helpful teaching of woodworking techniques to some friends of mine.

Wish me luck!

Sunday, July 11, 2010

Staining to Bring Out the Beauty

As promiced, here is how it looks with stain. I still need to put on base trim and the backing, but you can start to get the idea of the color and look I am going for.

The drawer without base trim and still needing a little more stain on the inside. This is freshly stained so the flash is making it look uneven. Once I can sand it and throw on some shellac, it will look a LOT prettier.

I also got the center piece of the unit stained. Again it still needs base trim and backing.


This is how they will look together (except of course there will be a 3rd piece with another huge drawer on the other side of the center piece)


Now to just find time to build the other drawer and sand and stain that piece. :-) Its a work in progress!